How to Create Your First AI Influencer (Step-by-Step)
Complete beginner tutorial for creating your first AI influencer. Character design, content generation, and platform setup explained.
Creating an AI influencer takes about 3-5 hours of focused work for the initial setup, then 1-2 hours daily for content and engagement. You don't need technical skills, artistic ability, or existing followers. You need a clear concept, the right tools, and a systematic approach.
This guide walks through every step from blank slate to live, monetizing AI influencer. Follow the steps in order - each builds on the previous one, and skipping ahead creates problems you'll need to fix later.
Before Starting: What You Need
Time commitment: 3-5 hours for initial setup, then 1-2 hours daily ongoing
Budget options:
- Free start: $0 (limited tools, manual work)
- Recommended: $99/month (apatero.ai with full features)
- Maximum: $200-300/month (premium tools + agency software)
No requirements for:
- Technical or coding skills
- Photography or design ability
- Existing social media following
- Previous creator experience
Step 1: Choose Your Niche and Concept
Your niche determines everything - the content you create, the fans you attract, and the money you can make. Generic AI influencers fail. Specific ones succeed.
High-Performing Niches
| Niche | Description | Audience | Earning Potential |
|---|---|---|---|
| Fitness/Athletic | Gym content, workout shots, athletic wear | Health-focused fans | High |
| Glamour/Fashion | High-end looks, fashion-forward content | Style enthusiasts | High |
| Girl-Next-Door | Relatable, approachable persona | Broad appeal | Medium-High |
| Alternative/Goth | Edgy aesthetic, unique style | Niche but loyal | Medium-High |
| Professional | Business attire, corporate aesthetic | Specific fetish market | Medium |
| Artistic | Creative, editorial, unusual | Art-focused audience | Medium |
Defining Your Character Concept
Answer these questions before generating any images:
Demographics:
- Age range: 18-22, 23-28, 29-35, 35+?
- Ethnicity/appearance: Specific look or ambiguous?
- Body type: What fits your niche?
Personality:
- Tone: Playful, mysterious, confident, sweet, dominant, submissive?
- Interests: What does your character like? (This shapes content themes)
- Communication style: Emoji-heavy, minimal, flirty, intellectual?
Aesthetic:
- Color palette: What colors dominate their content?
- Settings: Where do they appear? (home, gym, outdoors, studio)
- Style: Casual, glamorous, sporty, professional?
Character Brief Example
Name: Luna Age: 24 Niche: Fitness/Glamour crossover Personality: Confident, playful, motivating. Uses fitness metaphors. Encourages fans. Aesthetic: High-contrast lighting, gym and bedroom settings, athletic wear and lingerie crossover. Purple and black color accents. Unique angle: "Your gym crush who notices you" fantasy
Write a similar brief for your character. This becomes your reference for all content decisions.
Step 2: Generate Reference Images
Before training a consistent character model, you need high-quality reference images that define what your character looks like. These references determine your character's permanent appearance.
What Makes Good References
Technical requirements:
- High resolution (at least 1024x1024)
- Clear face visibility (front and side angles)
- Consistent lighting across images
- Multiple expressions (neutral, smiling, serious)
Content requirements:
- 5-10 diverse images showing the same person
- Different angles of face
- Full body and close-up shots
- Various poses
Generating References on apatero.ai
- Log into your apatero.ai creator account
- Navigate to "Create Persona"
- Enter your character brief details
- Generate initial concepts (15-20 images)
- Select the 5-10 best images that look like the same person
- Mark these as reference images for LoRA training
Free Alternative: Manual Reference Selection
If using free tools (SeaArt, Leonardo free tier):
- Generate 50-100 images with consistent prompts
- Manually select 5-10 that look most similar
- Use these as references for future prompts
- Accept lower consistency until you can afford proper training
Reference Quality Checklist
Before proceeding, verify your references include:
- At least 5 images of the same character
- Clear, high-resolution faces
- At least 2 different angles
- At least 2 different expressions
- Consistent features across all images
If your references don't meet these criteria, generate more until they do. Poor references create inconsistent characters permanently.
Step 3: Train for Character Consistency
Character consistency is what makes fans feel like they're following a real person, not a collection of random AI images. This step is critical.
What LoRA Training Does
LoRA (Low-Rank Adaptation) training creates a custom AI model that knows what your specific character looks like. Once trained, every image generated with your LoRA maintains the same face, features, and recognizable appearance.
Without LoRA: Each generation creates a slightly different person With LoRA: Every generation shows the same recognizable character
Training on apatero.ai
apatero.ai handles LoRA training automatically:
- Submit your reference images (minimum 5, recommended 10)
- System processes and trains your character model
- Training completes in 1-4 hours
- All future generations use your trained model
Training Timeline
| Method | Time | Quality | Cost |
|---|---|---|---|
| apatero.ai auto | 1-4 hours | High | Included |
| External service | 24-48 hours | Variable | $50-200 |
| Self-trained (local) | 4-8 hours | Depends on skill | Free (hardware) |
Verifying Training Quality
After training completes, generate 20-30 test images:
- Different poses
- Different outfits
- Different settings
- Different lighting
If your character is recognizable across all variations, training succeeded. If faces change significantly, you may need to retrain with better references.
Step 4: Build Your Content Vault
Don't launch with zero content. Build a library first - this gives you posting runway and lets you select the best images rather than posting whatever you generate each day.
Minimum Launch Requirements
| Content Type | Minimum | Recommended |
|---|---|---|
| Profile images | 5 | 10-15 |
| Wall posts | 30 | 50-100 |
| PPV sets (5-10 images each) | 3 | 10+ |
| Teaser clips | 5 | 10-15 |
Total images: 100-200 minimum, 300-500 recommended
Content Categories to Generate
Profile Content:
- Main profile photo (close-up, high quality)
- Banner/header image
- Verification-style selfie
Wall Content (Public + Subscriber):
- Lifestyle shots (daily life themes)
- Outfit showcases
- Setting variations (bedroom, bathroom, outdoors)
- Seasonal content (holidays, events)
PPV Content (Premium):
- Themed sets (5-10 related images)
- Escalating reveals within sets
- Exclusive scenarios not on wall
Story/Teaser Content:
- Quick glimpses
- Behind-the-scenes style
- Polls and questions (text-based)
Generation Workflow
- Batch by theme: Generate 20-30 images of one scenario, then move to next
- Quality filter: Keep best 50%, delete rest
- Organize immediately: Sort into folders (Wall, PPV, Stories)
- Schedule variety: Mix content types in your posting schedule
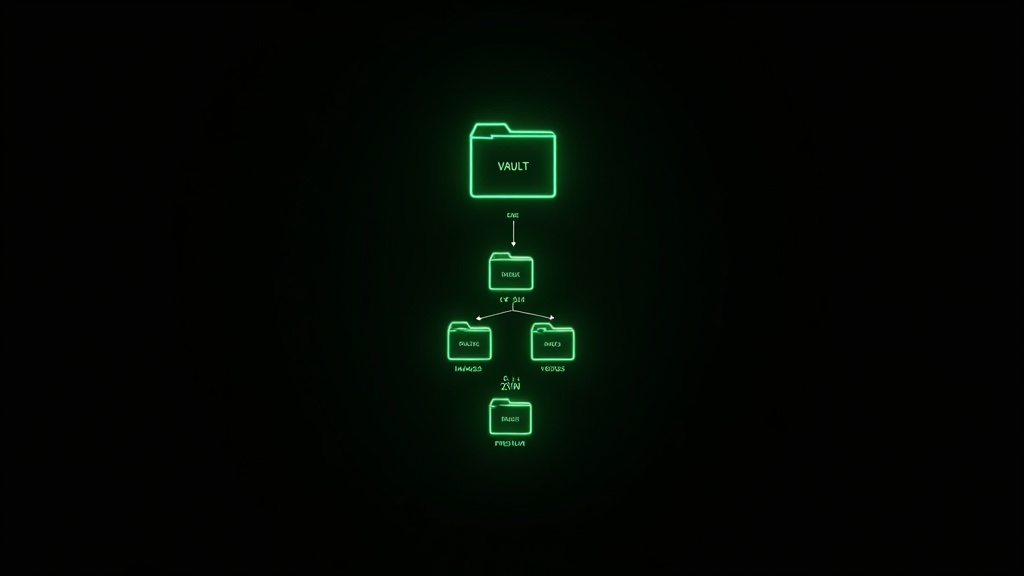
Content Vault Organization
Create this folder structure:
Content Vault/
├── Profile/
├── Wall/
│   ├── Posted/
│   └── Ready/
├── PPV/
│   ├── Set 1 - [Theme]/
│   ├── Set 2 - [Theme]/
│   └── ...
├── Stories/
└── Archive/
Move images to "Posted" after using them. This prevents accidental reposts and shows what's been used.
Step 5: Set Up Your Monetization Platform
With content ready, create your platform presence. Choose one platform to start - you can expand later.
Platform Comparison for First-Timers
| Platform | Best For | AI Policy | Setup Difficulty |
|---|---|---|---|
| Fanvue | AI-focused creators | Very friendly | Easy |
| apatero.ai | Integrated workflow | Built for AI | Easiest |
| Fansly | Multi-tier strategy | Permissive | Moderate |
| OnlyFans | Maximum audience | Allowed but gray | Moderate |
Platform Setup Checklist
Account basics:
- Create account with valid email
- Complete identity verification (human behind account)
- Set up payment receiving method
- Configure notification settings
Profile optimization:
- Upload main profile photo (best close-up)
- Set banner image
- Write bio (see below for template)
- Add location (can be fictional)
- Connect social media if applicable
Content settings:
- Set subscription price
- Configure PPV limits
- Set tip amounts
- Enable/disable features as needed
Bio Writing Template
Structure your bio to convert visitors into subscribers:
Line 1: Hook - Who you are in one compelling sentence Line 2-3: What subscribers get Line 4: Call to action Line 5: Personality element
Example: "Your fitness-obsessed girlfriend who can't stop taking gym mirror selfies 💪
📸 Daily posts 🔥 Exclusive workouts (in less and less clothing) 💬 Real conversations, not auto-replies
Subscribe and let's get sweaty together 😈
I respond to every DM - yes, even yours"
Subscription Pricing Strategy
| Price Point | Strategy | Best For |
|---|---|---|
| $3.99-5.99 | Volume - low price, many subscribers | New creators, testing |
| $9.99-14.99 | Balanced - moderate price and volume | Most AI influencers |
| $19.99-29.99 | Premium - fewer subscribers, higher value | Established, unique content |
| $39.99-49.99 | Exclusive - very few, very committed | Strong brand, proven demand |
First persona recommendation: Start at $9.99. It's low enough to convert curious visitors and high enough to indicate value. Adjust after 30 days based on data.
Step 6: Create Your Posting Schedule
Consistency beats intensity. A sustainable daily schedule outperforms sporadic bursts of content.
Recommended Posting Frequency
| Content Type | Frequency | Best Times |
|---|---|---|
| Wall posts | 2-3/day | Morning, afternoon, evening |
| Stories | 3-5/day | Spread throughout day |
| PPV mass messages | 2-3/week | Evening (8-10 PM fan's timezone) |
| Custom responses | Ongoing | Within 1-4 hours of request |
Sample Week Schedule
Monday:
- AM: Lifestyle post (starting the week)
- PM: Story teasers × 3
- Night: PPV message with weekend content
Tuesday:
- AM: Casual/chill post
- PM: Behind-the-scenes style story
- Night: Engagement responses
Wednesday:
- AM: Themed content (workout, outfit, etc.)
- PM: Stories with polls/questions
- Night: Direct message conversations
Thursday:
- AM: Spicier wall content
- PM: PPV teaser on story
- Night: PPV mass message
Friday:
- AM: Weekend anticipation post
- PM: Stories × 5 (building excitement)
- Night: Premium PPV offer
Weekend:
- Lighter posting, 1-2 per day
- Focus on direct messages and engagement
- Prepare content for next week
Scheduling Tools
If using apatero.ai, scheduling is built-in. For other platforms:
- Buffer or Later for social media
- Platform native scheduling where available
- Google Calendar reminders for manual posting
Step 7: Launch Strategy
A strategic launch beats a random start. Build anticipation before revealing your full profile.
Pre-Launch (Days 1-3)
Day 1: Create accounts on social platforms (Instagram, Twitter/X, Reddit)
- Use AI influencer images in profile
- Post 3-5 images establishing character
- Don't link to monetization platform yet
Day 2: Continue social posting
- Engage in relevant communities
- Post in AI-friendly subreddits
- Build small following before launch
Day 3: Launch tease
- Post "something special coming tomorrow"
- Create anticipation without revealing everything
Launch Day (Day 4)
Morning:
- Ensure monetization platform profile is complete
- Have 10+ posts already visible on profile
- Set "launch day" promotional price if desired
Afternoon:
- Post on all social channels linking to platform
- Use multiple posts spread over hours
- Engage with everyone who comments
Evening:
- Send first mass message to any early subscribers
- Post more content to show active account
- Continue social promotion
Post-Launch Week
- Post at full schedule (2-3 wall posts daily)
- Respond to every message within hours
- Track which content performs best
- Adjust strategy based on early data
Step 8: Promotion Fundamentals
Your monetization platform has no discovery - you must drive traffic yourself.
Primary Promotion Channels
Reddit:
- Find subreddits that allow AI content
- Post with genuine community participation
- Don't spam - build reputation first
- Include link in profile, not every post
Instagram:
- SFW content only on main grid
- Stories can be slightly more suggestive
- Link in bio to monetization platform
- Use AI influencer hashtags
Twitter/X:
- More content freedom than Instagram
- Engage with AI influencer community
- Quote-tweet other creators (builds network)
- Direct links allowed
TikTok:
- SFW only but huge reach potential
- Behind-the-scenes content works
- Viral potential is highest here
- Link in bio drives traffic
Promotion Time Investment
| Channel | Daily Time | Importance |
|---|---|---|
| 30-45 min | High (main traffic source) | |
| 15-30 min | Medium | |
| 15-30 min | Medium | |
| TikTok | 15-30 min | Variable (viral or nothing) |
Total: 1-2 hours daily on promotion
What Actually Drives Subscribers
| Factor | Impact | How to Optimize |
|---|---|---|
| Content quality | High | Invest in good generation tools |
| Posting consistency | High | Never miss scheduled posts |
| Engagement speed | High | Reply within 1-4 hours |
| Niche clarity | Medium | Be specific, not generic |
| Pricing | Medium | Test and adjust |
| Social proof | Medium | Share milestones, fan messages |
Step 9: Engagement and Retention
Getting subscribers is step one. Keeping them is where the real money is.
Response Time Targets
| Message Type | Target Response | Maximum Wait |
|---|---|---|
| New subscriber | 1 hour | 4 hours |
| Purchase/tip | 15 minutes | 1 hour |
| Custom request | 1 hour | 4 hours |
| General message | 4 hours | 12 hours |
Conversation Starters for New Subscribers
Don't wait for them to message. Send a welcome message within minutes of subscription:
Template 1 (Warm): "Hey [if name shown]! 💕 I noticed you just joined - thank you so much! I'm [name], and I'm actually here chatting, not some auto-message bot. What made you subscribe? I'm curious! 😊"
Template 2 (Playful): "Well well well... look who just made my day better 😏 Welcome to my little corner of the internet. Fair warning: I respond to everything, so don't be shy. What should I call you?"
Template 3 (Direct): "New subscriber alert! 🚨 Thanks for joining! Quick question so I can show you the good stuff - are you more into [option A] or [option B] content?"
Retention Tactics
Daily:
- Respond to all messages
- Post consistently
- Story polls/questions for engagement
Weekly:
- Check who hasn't engaged lately
- Send "thinking of you" messages to quiet subscribers
- Special PPV offers to active fans
Monthly:
- Anniversary messages for long-term subscribers
- Loyalty rewards (exclusive content)
- Feedback requests (what do they want more of?)
Step 10: Track and Optimize
After your first month, you have data. Use it.
Key Metrics to Track
| Metric | What It Shows | How to Improve |
|---|---|---|
| New subscribers/day | Promotion effectiveness | Better content, more posting |
| Churn rate | Retention quality | Better engagement, value |
| PPV conversion | Sales effectiveness | Better teasers, pricing |
| Message response rate | Fan engagement | More personal touch |
| Revenue per subscriber | Overall value delivery | Upselling, better content |
Monthly Review Questions
- What content performed best? (Most engagement, most tips)
- What content underperformed? (Low views, no conversions)
- Where did most subscribers come from?
- What questions did fans ask most?
- What would I do differently?
Optimization Actions
If subscribers don't convert:
- Lower price temporarily
- Improve profile and bio
- Post more preview content
If subscribers churn quickly:
- Increase engagement frequency
- Improve content variety
- Ask for feedback directly
If PPV doesn't sell:
- Better teaser images
- Lower prices initially
- More creative themes
If no one messages:
- Send more first messages
- Ask questions in posts
- Create conversation starters
Common Mistakes to Avoid
Starting without content vault: Scrambling daily creates stress and inconsistent quality. Build your library first.
Generic character concept: "Attractive woman" isn't a concept. Specific niches with clear personalities outperform generic approaches every time.
Inconsistent posting: Missing days kills momentum. Fans expect regular content. Set realistic schedules you can maintain.
Ignoring messages: Each ignored message is a lost sale and a cancelled subscription. Response speed directly correlates with earnings.
Underpricing: $3.99 subscriptions attract low-value fans. Price reflects perceived value. Start moderate, not minimum.
No promotion: "Build it and they will come" doesn't work. Active, consistent promotion is required.
Your First 30 Days Timeline
| Days | Focus | Goals |
|---|---|---|
| 1-2 | Concept and references | Character brief, 10 reference images |
| 3-4 | Training and generation | Trained model, 100+ images |
| 5-6 | Platform setup | Complete profile, pricing set |
| 7 | Launch | Live with 10+ posts |
| 8-14 | Promotion push | 10+ subscribers |
| 15-21 | Content and engagement | Daily posting, all messages answered |
| 22-30 | Optimization | Analyze data, adjust approach |
30-day target: 20-50 subscribers, $200-500 revenue, sustainable daily routine
Ready to create your first AI influencer? apatero.ai handles character training, content generation, and monetization in one platform - start your persona today.
Apatero Team
Building the future of AI influencer monetization.